You know it's somewhere on your Mac. That PDF your client sent last week, the screenshot from yesterday, the contract you downloaded three days ago. You check Downloads, then Desktop, then Documents. You try Spotlight. You open five folders. Ten minutes later, you're still looking.
Here are 10 practical ways to find files faster and stop wasting time on your Mac. Some take 30 seconds to implement, others require a small one-time setup, but all of them will save you countless hours in the long run.
1. Master Spotlight Search with Advanced Operators
Spotlight is your fastest way to find files, but most people only scratch the surface of what it can do.
Basic Spotlight tips:
- Press Cmd + Space to open Spotlight from anywhere
- Start typing the filename, content, or file type
- Use arrow keys to navigate results, press Enter to open
Advanced Spotlight operators most people don't know:
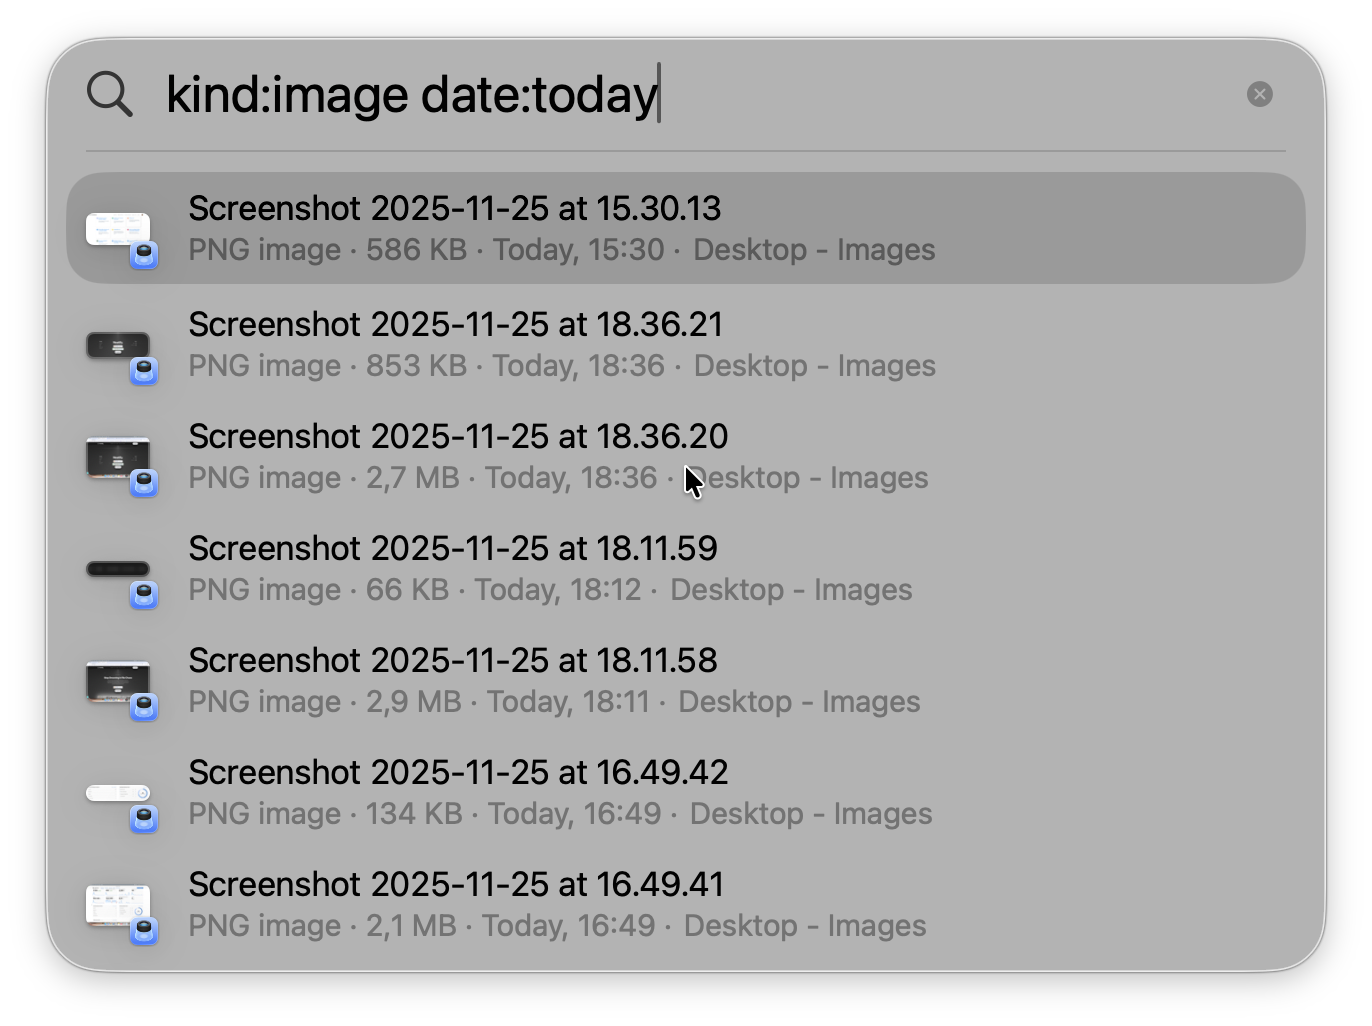
- Type kind:pdf to see only PDF files. Works with: kind:image, kind:document, kind:presentation, kind:video
- Type date:today or date:yesterday to filter by date. Also works: date:11/20/2024
- Type modified:11/15/2024 to find files changed on a specific date
- Type author:"John Smith" to find documents created by someone specific
Combine operators: Try "kind:pdf date:today client" to find PDFs from today with "client" in the filename or content.
Pro tip: Spotlight searches file contents, not just names. If you remember text inside a document but not the filename, just type that text in Spotlight.
2. Use Consistent, Searchable File Naming
Your file naming system is either saving you time or costing you hours. Here's a naming convention that makes files instantly findable.
The formula: Date_Project_Description_Version
Examples:
- 2024-11-20_ClientABC_Contract_v2.pdf
- 2024-11-15_Website_Homepage-Mockup_Final.png
- 2024-11_Marketing_Report_Draft.docx
Why this works:
- Date first sorts files chronologically automatically
- Project name groups related files when searching
- Description tells you what it is at a glance
- Version prevents "final_v2_FINAL_actually_final.docx" chaos
Use dashes or underscores, never spaces. Spaces in filenames cause problems with certain apps and command-line tools. Pick one separator and stick with it.
Avoid generic names like "Document.pdf" or "Screen Shot 2024-11-20.png". Future you won't remember what these are.
Start using this system today for new files. You don't need to rename everything retroactively, just be consistent going forward.
3. Add Files to Finder Sidebar for Instant Access
Your most-used folders should be one click away, not buried five levels deep in Finder.
How to add folders to sidebar:
- Open Finder and navigate to the folder
- Drag the folder to the Favorites section in the left sidebar
- Rearrange by dragging up or down
What to add:
- Active project folders you access daily
- Your client work directory
- Frequent reference materials folder
- Any folder you navigate to more than once per day
Remove clutter: Right-click items you never use in the sidebar and select "Remove from Sidebar". Keep only what you actually access regularly.
This seems simple, but it eliminates dozens of clicks per day. If you're navigating to the same folder three times a day, that's 1,000+ unnecessary clicks per year.
4. Use Finder Tabs to Keep Multiple Locations Open
Stop opening ten Finder windows and losing track of where things are. Use tabs instead.
- Open a new tab: Press Cmd + T in Finder (just like a web browser)
- Switch between tabs: Press Cmd + Shift + [ or ] to move left/right through tabs
- Drag files between tabs: Drag a file to a tab at the top to switch to that location, then drop the file
Set up a tab workflow:
- Tab 1: Downloads folder
- Tab 2: Current project folder
- Tab 3: Documents for reference files
Keep this Finder window open all day and pin it to your Dock. You'll always have quick access to your most important locations without opening multiple windows.

5. Enable Recent Files in Finder
The Recent folder shows your most recently opened files, regardless of where they're stored. It's built into macOS but many people don't use it.
How to access:
- Open Finder
- Look for "Recent" in the sidebar (usually under Favorites)
- If you don't see it: Finder > Preferences > Sidebar > check "Recent"
Why this is powerful: You don't need to remember where you saved something. If you worked on it recently, it's in Recent.
Pro tip: Sort by Date Modified by clicking the column header. Your most recent work appears at the top.
This is especially useful when clients email you asking about "that document we discussed last week" and you have no idea what it's called or where you saved it.
6. Create Smart Folders for Automatic File Collections
Smart Folders are saved searches that automatically update. Think of them as dynamic playlists for your files.
Useful Smart Folders to create:
"Large Files" folder:
- Open Finder > File > New Smart Folder
- Add criteria: File size is greater than 100 MB
- Save to sidebar
- Instant view of files eating your storage
"This Week's Work" folder:
- Criteria: Kind is Document AND Date modified is within last 7 days
- See everything you've worked on recently in one place
"Unorganized Downloads" folder:
- Criteria: Location is Downloads AND Date added is within last 30 days
- Reminds you to organize recent downloads before they pile up
Smart Folders don't move files, they just create dynamic views. The same file can appear in multiple Smart Folders.
7. Use Color Labels to Mark Important Files
Color labels in Finder let you visually categorize files without moving them.
Right-click any file > select a color label > give it a meaning in your system.
Example label system:
- Red: Urgent, needs immediate attention
- Orange: To review this week
- Yellow: Waiting on someone else
- Green: Completed, archived
- Blue: Reference material
Search by color: In Spotlight, type the color name (e.g., "red") to find all red-labeled files.
Customize label names: Go to Finder > Preferences > Tags to rename colors to match your workflow (e.g., rename Red to "Urgent").
Color labels work across your entire Mac, so you can mark files in any folder and find them later by color.
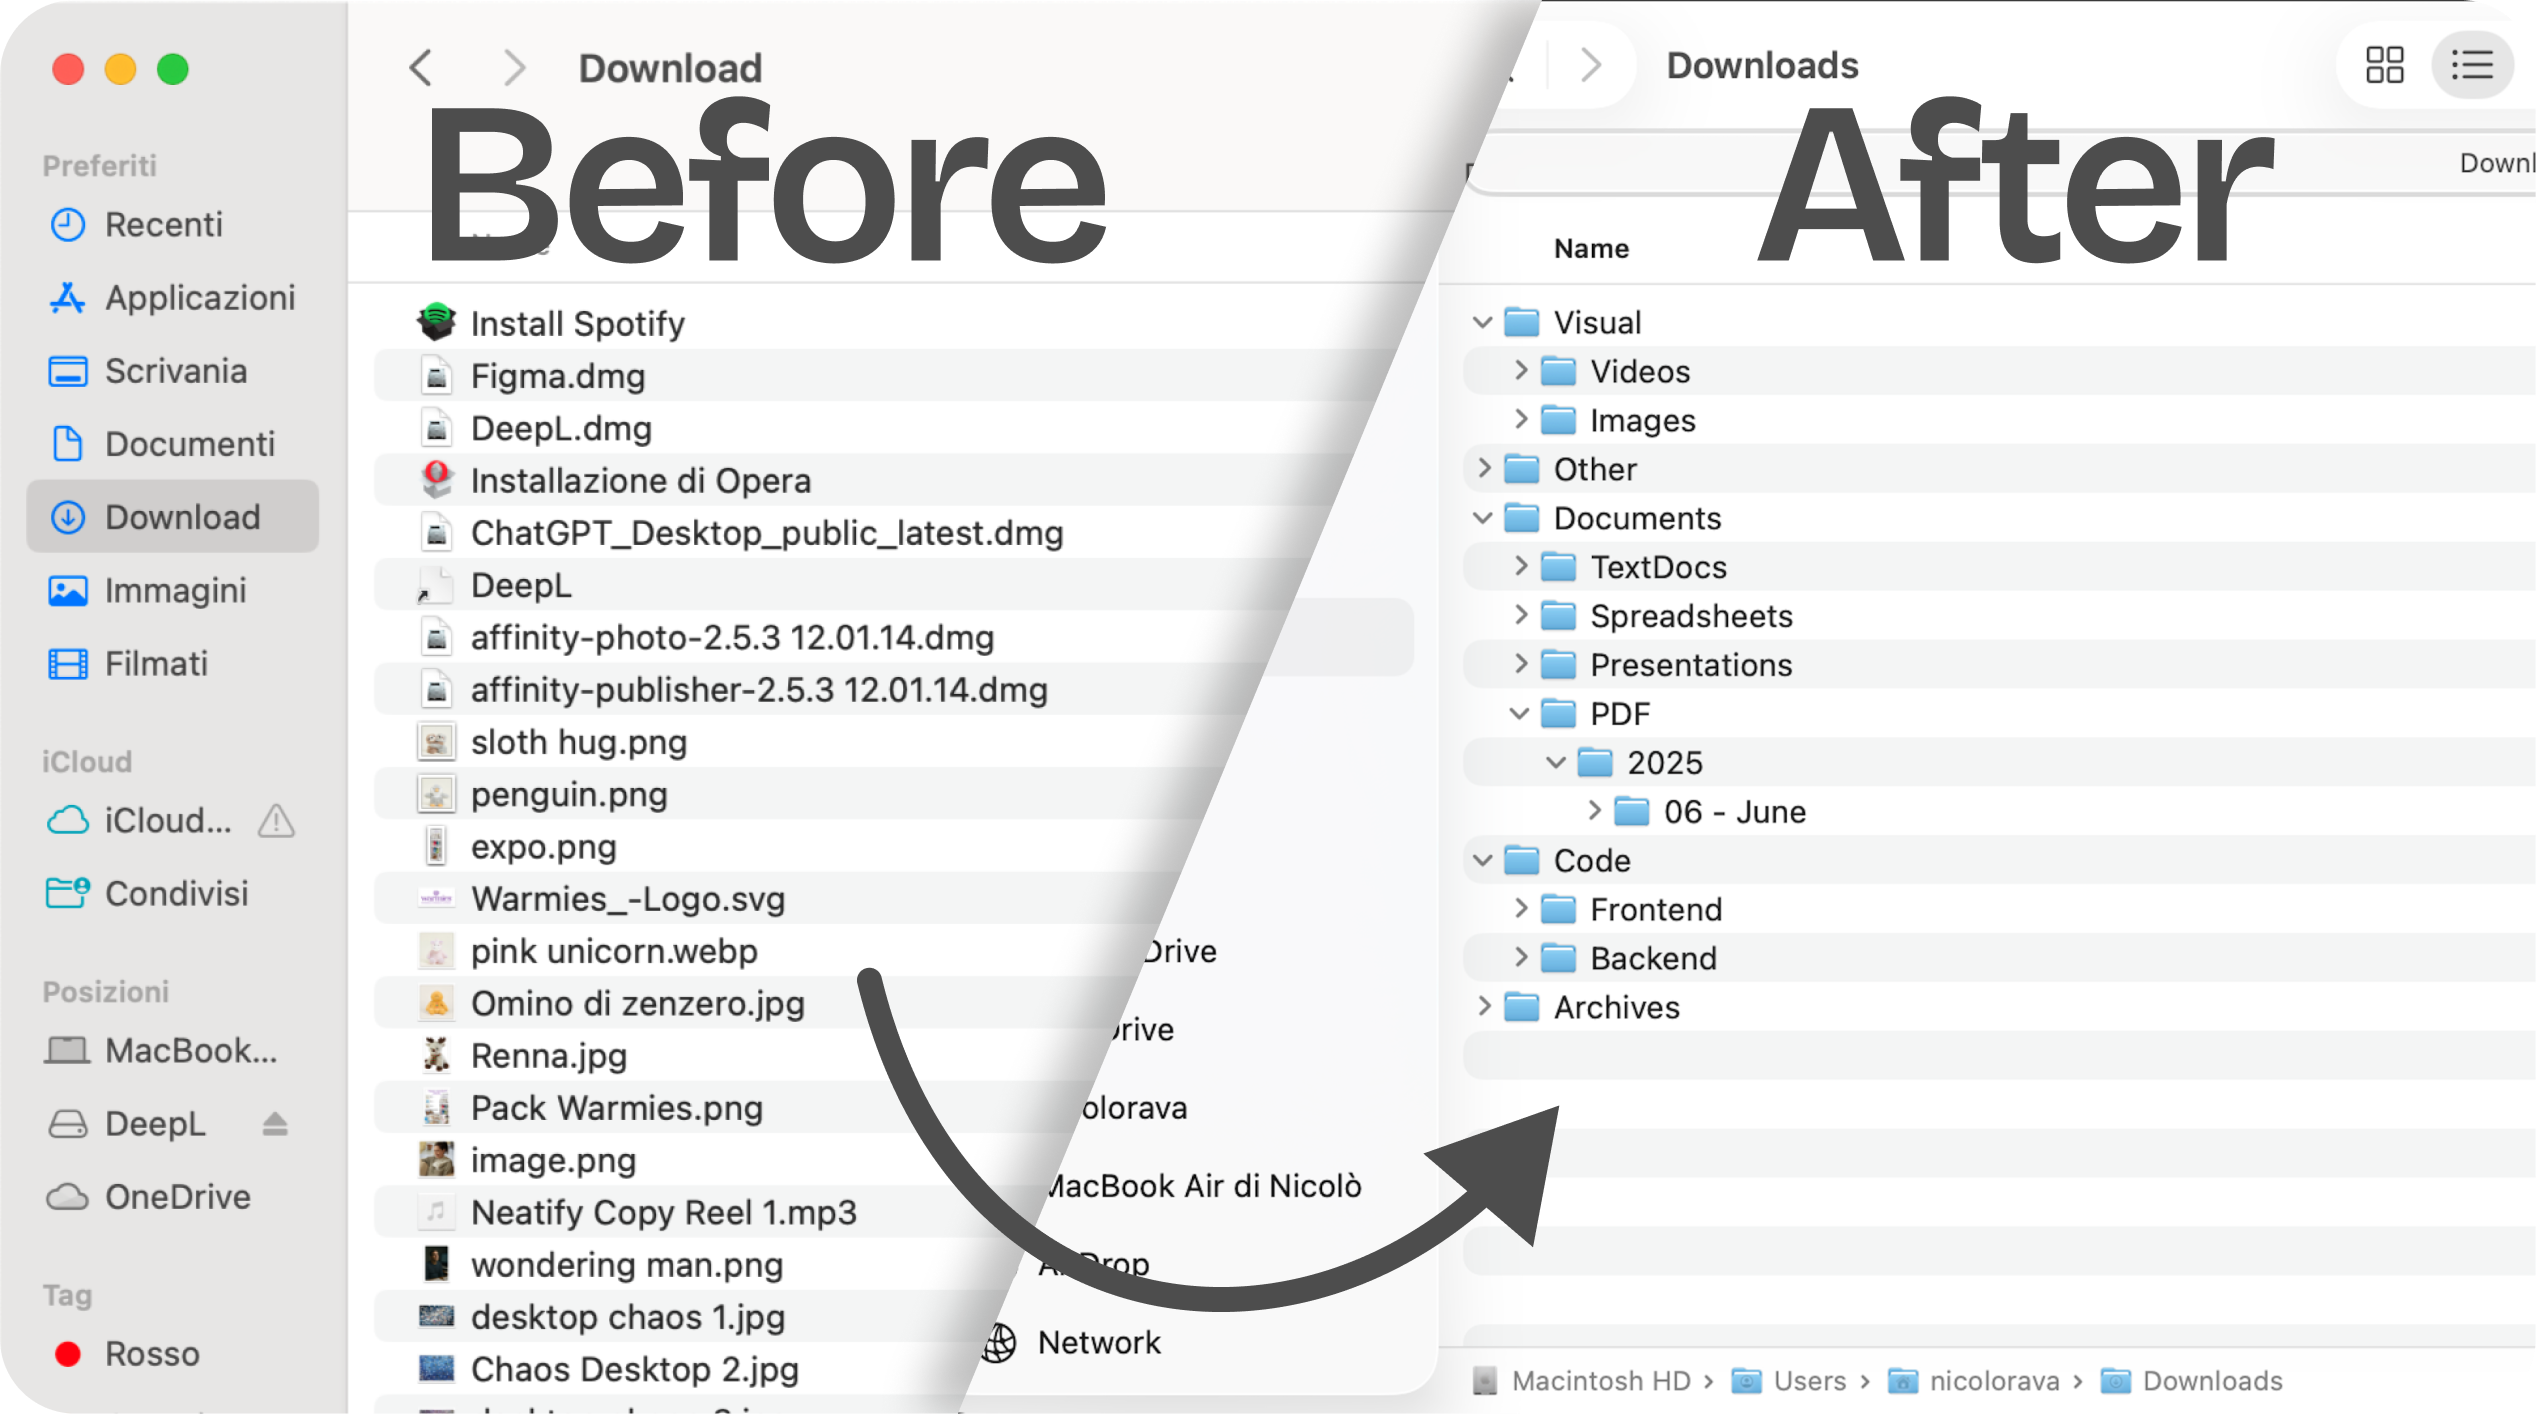
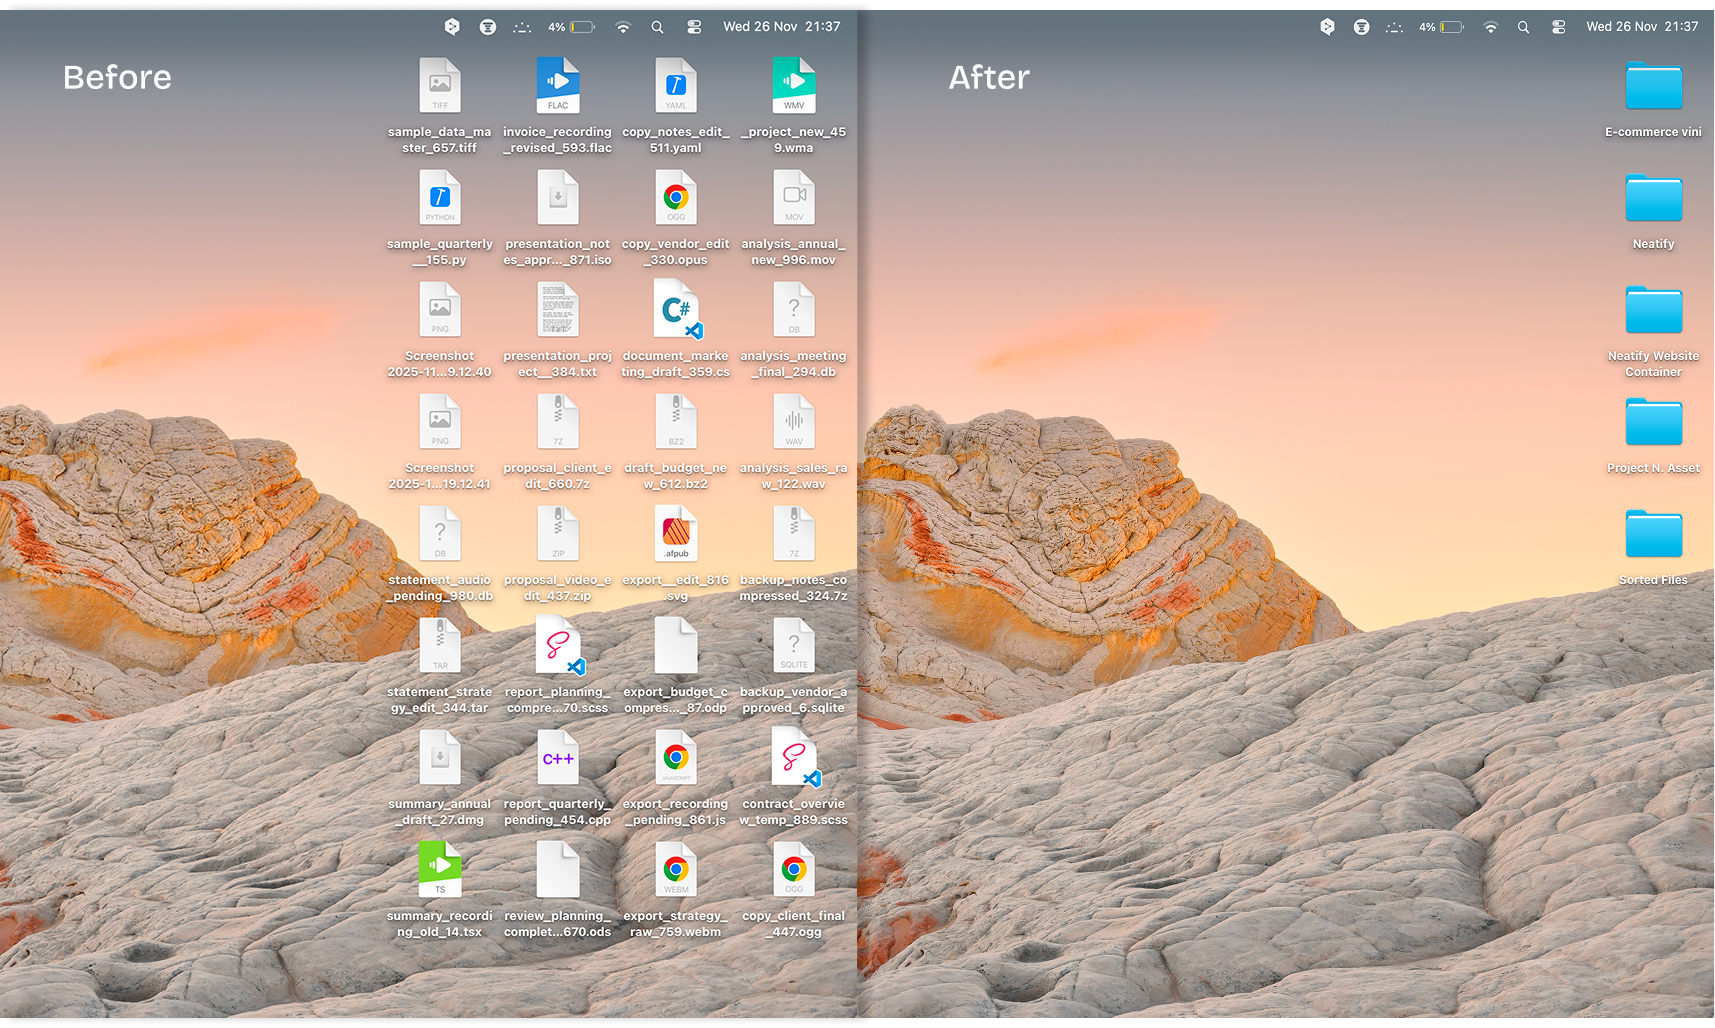
8. Set Up Automated File Organization
Here's the truth: if you're manually sorting files every day, you're wasting time on work a computer should do for you.
The automation approach:
Instead of deciding where each file goes every time you save something, set up rules once and let automation handle it. When you download a PDF, it automatically goes to Documents/PDFs. When you save a screenshot, it goes to Images/Screenshots.
How automation saves time:
- Zero decision fatigue when saving files
- No manual sorting of Downloads folder
- Everything is already where it needs to be when you need it
- Switch between different organization setups instantly (e.g., work mode vs. personal mode)
Modern automation tools use visual interfaces with no coding required. You set up your organization system in seconds, activate it, and forget about it.
When automation makes sense:
- You download more than 10 files per day
- You work on multiple projects simultaneously
- You've tried manual organization and fallen behind
- You're a student managing multiple courses or a freelancer juggling clients
Automation isn't overkill: it's the difference between spending 10 minutes per day organizing files (60+ hours per year) versus spending 5 minutes once to set it up.
9. Use Spotlight Comments for Better Searchability
Spotlight searches file contents and metadata, including comments you add manually. This is perfect for files that aren't easily searchable otherwise.
How to add Spotlight comments:
- Select a file in Finder
- Press Cmd + I to open Get Info
- Type in the "Comments" field
- Close the window (saves automatically)
When to use this:
- Images without text: Add keywords so you can find them later
- Client files: Add client name even if not in filename
- Project files: Add project keywords for easy searching
- Reference materials: Add context about why you saved it
Example: You download a competitor's pricing page as a screenshot. Add comments: "competitor pricing analysis reference SaaS November 2024"
Now you can search "competitor pricing" in Spotlight and find it instantly, even though those words aren't in the filename.
10. Clean Up Your Desktop and Downloads Weekly
This is the least exciting tip but often the most impactful. A weekly 5-minute cleanup prevents the avalanche.
Set a recurring reminder: Every Friday at 4 PM, clean your Desktop and Downloads.
The 5-minute cleanup process:
Minute 1-2: Delete anything you don't need
- Old installers (you can re-download them)
- Duplicate files
- Test files or temporary work
- Anything older than 90 days you haven't used
Minute 3-4: Move files to proper folders
- Documents to Documents folder
- Images to appropriate project folders
- Client work to client folders
Minute 5: Empty Trash
Make it a habit, not a decision. Don't think about whether you feel like cleaning up. Just do it every Friday before you close your laptop for the weekend.
A clean Downloads folder and Desktop mean you can actually see and access the files you need. Visual clutter creates mental clutter and slows you down.
Stop Wasting Time, Start Finding Files Faster
Finding files faster isn't about working harder, it's about working smarter with the right habits and tools. Start with the quick wins: master Spotlight operators, add folders to your sidebar, and create Smart Folders for common searches. These take minutes to implement but save hours over time.
Then build sustainable habits: use consistent file naming, schedule weekly cleanups, and consider automation if you're drowning in daily file management.
The goal isn't a perfectly organized Mac (that's unrealistic). The goal is spending less time searching and more time on work that actually matters. Pick two or three tips from this list, implement them today, and watch those wasted hours disappear.